COVER WORK & The Clandestine Cookie Jar
New Book Cover using 3D applications and modeling. How I did this in 8 Months of work.

Book Cover: The Clandestine Cookie Jar was a eight month project. I decided to do it in 3D as there were so many elements and I had eventually constructed a concept after a couple weeks looking at what I needed and talking with the client. Then came the challenges of finding the models I could afford and getting models elsewhere that were low to no cost. The 3D application I used was a low-end package that meaning the user did lots more work to get desired results. Renders were slow, and I did so many to see where I was at that the time ate away at production. 3D is usually quite expensive to a client, and I did not want to go crazy with costs I would have to pass on to billing, so I spent inordinate amounts of time searching 3D provider sites, if I could not otherwise easily build and texture my own models, but it was soon apparent I had to find all I could without any cost. Of course my time bled heavily anyway whenever searching assets and resources.
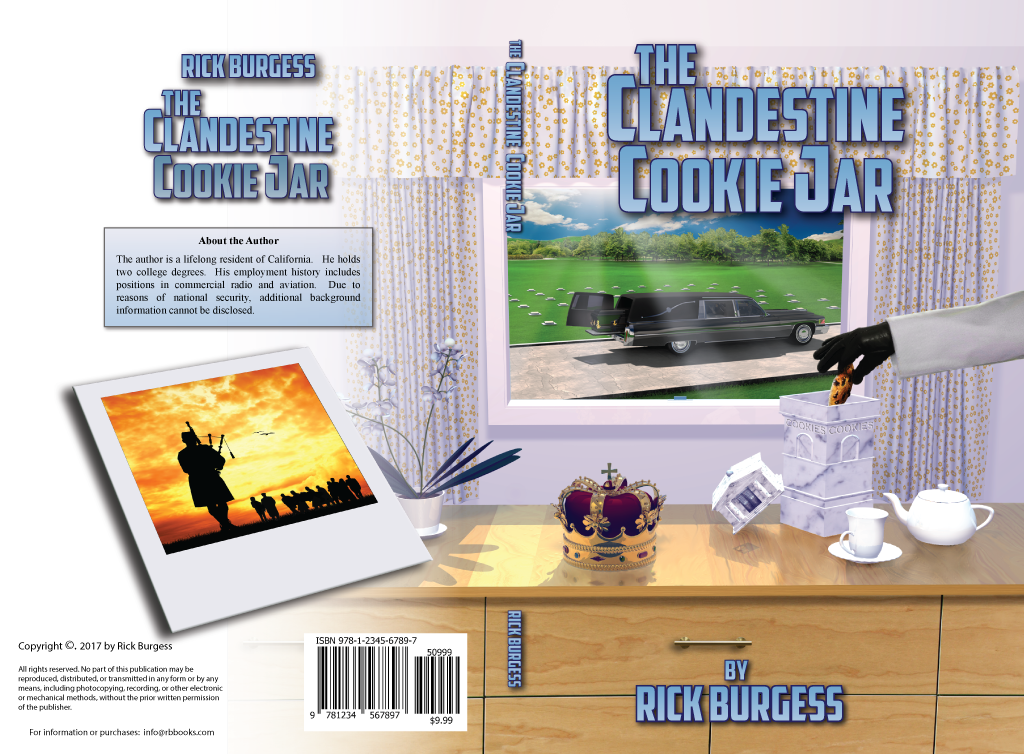
Final Cover Layout with faux barcode.
In the end I truly liked the final product. The realism and composition was what the cover needed. Enough to represent aspects of the story inside


3D Scene with Hearse, Casket and Cemetery. Rays as per author's concept and environment, trees foliage were done in Photoshop.
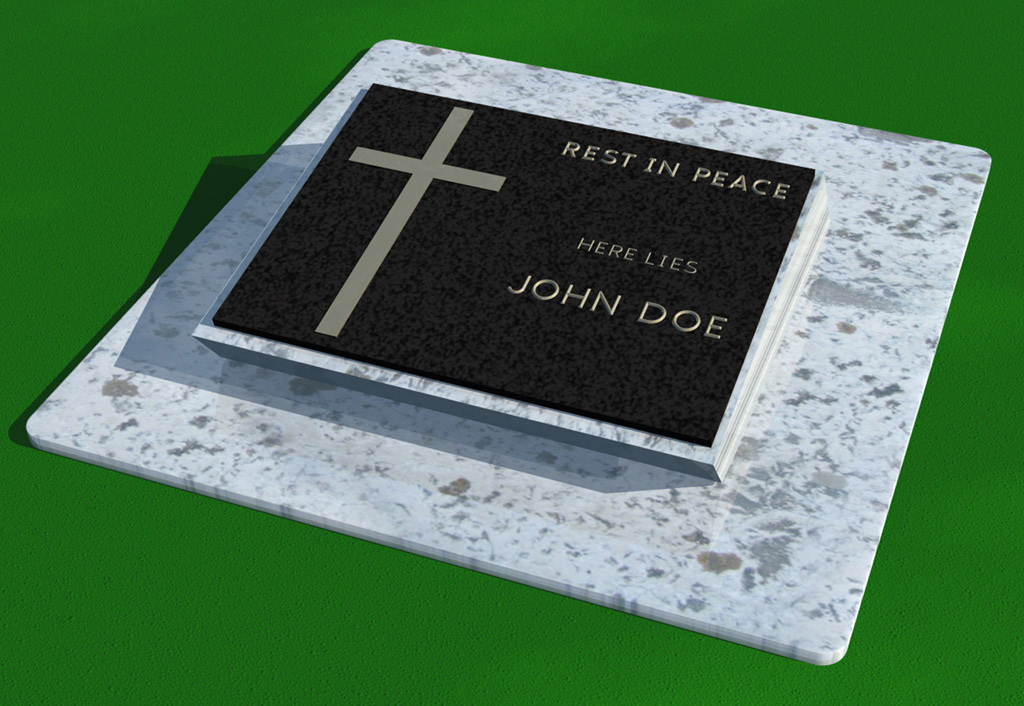
3D Gravestone. Seems a lot of work for such a tiny inclusion, but it had to be done. I ended up making a brass plaque version instead of the black marble I liked better.

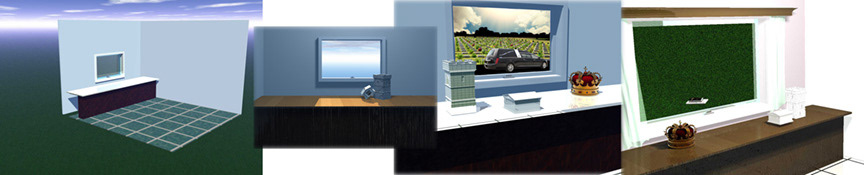
Here's an early pre-concept of the cemetery scene in 3D. I ended up building a new scene and adding in 2D trees. These trees made for very slow renders, so they had to go. The final trees were what I wanted anyway.
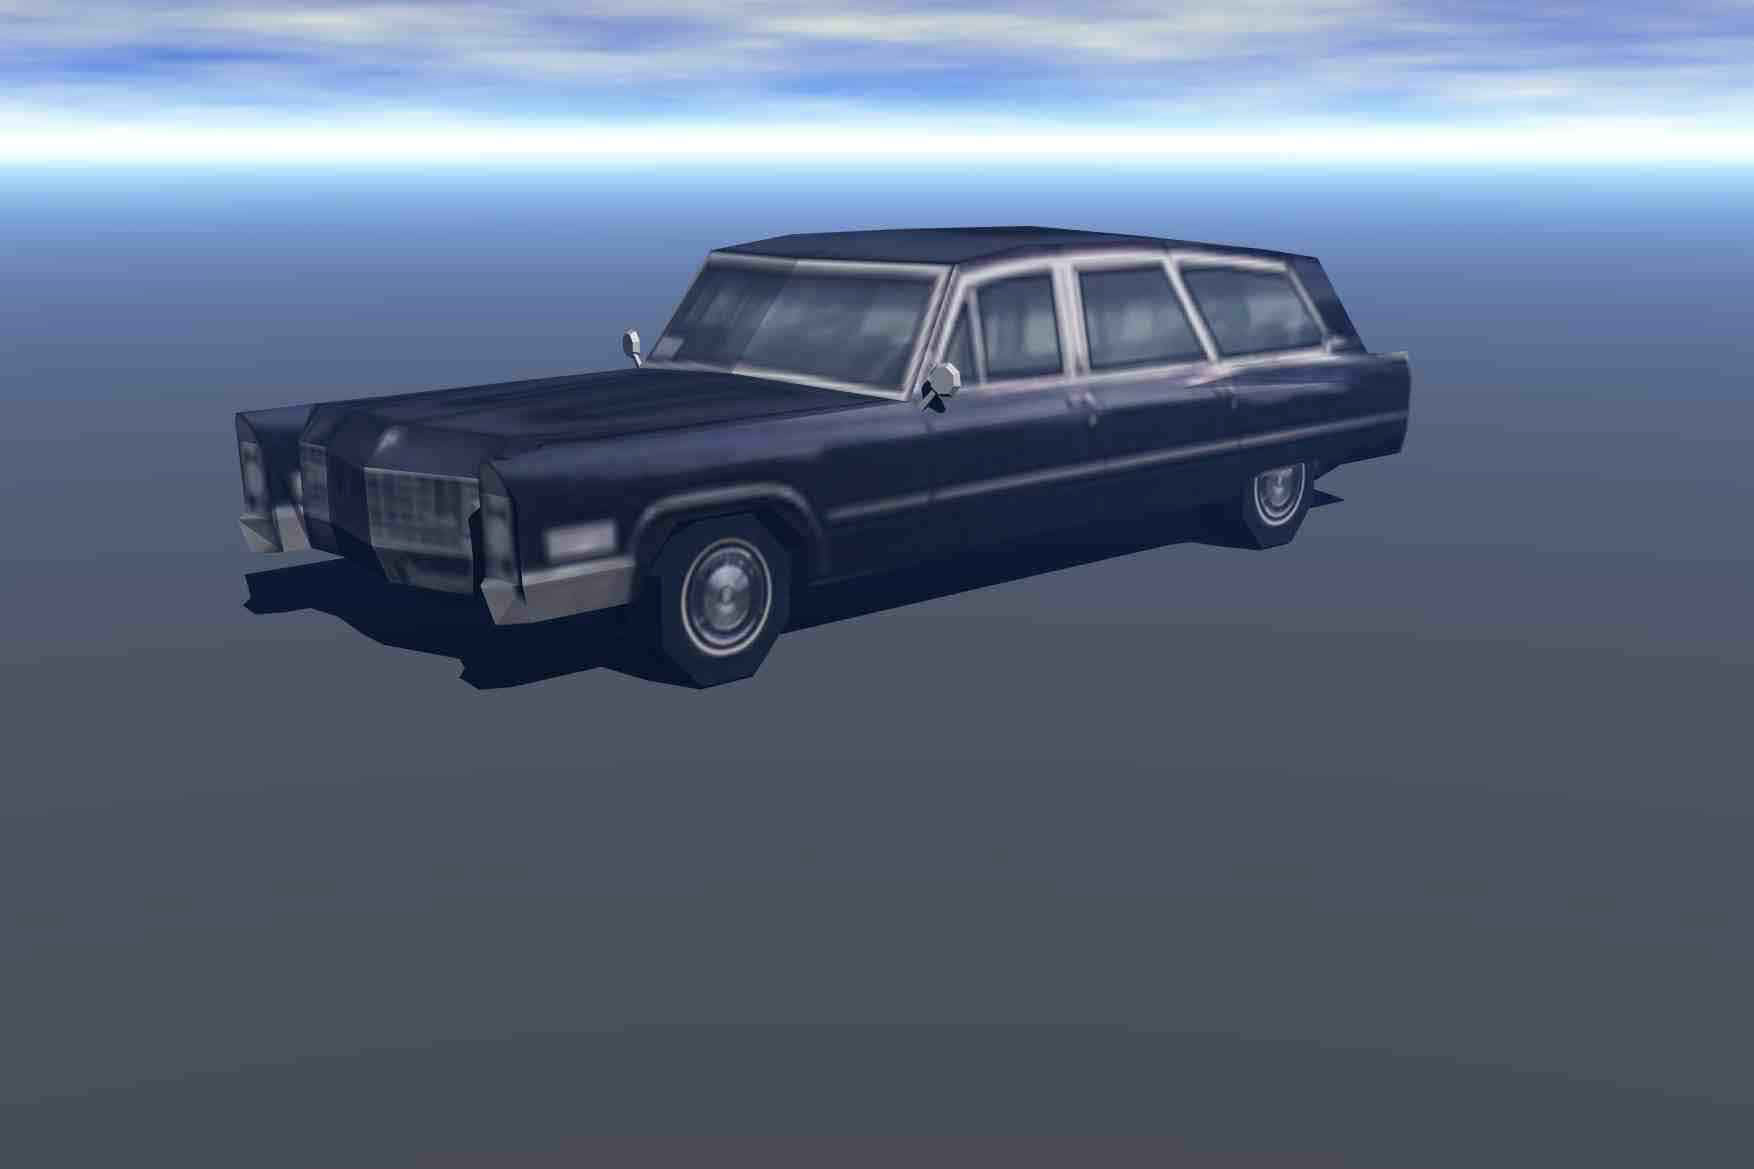
Here's how the model I purchased looked when I initially rendered it. But after I completely re-built the textures with high resolution files and increased the poligons on the models it looked like this (below).

I then refined and changed minor issues. But now I had to get a casket in back.
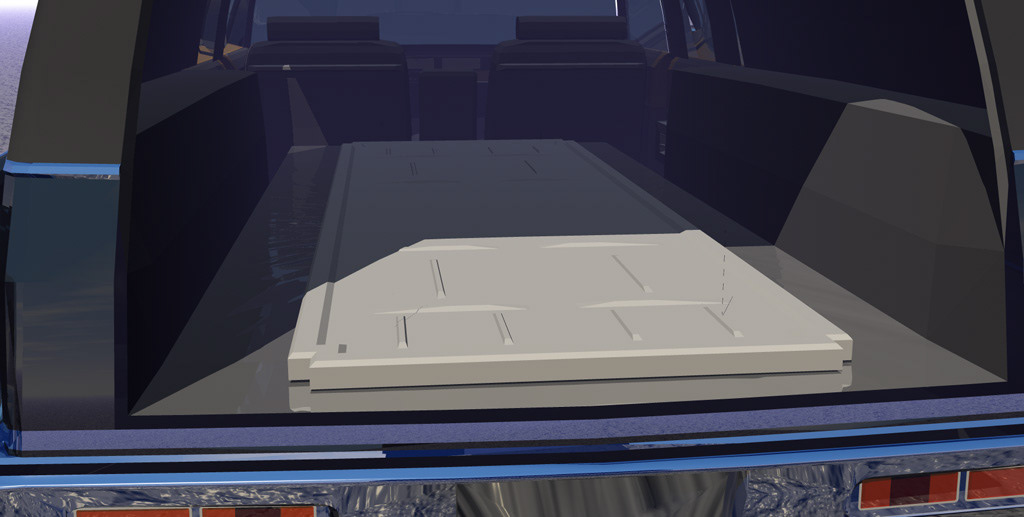
The model had good inside build so I could re-texture that and see the extending pallet for the casket.

I found a great casket model and dolled it up with better gold and black lacquer finish, placed it in the back of the Caddie, extended the pallet so it was a realistic addition.
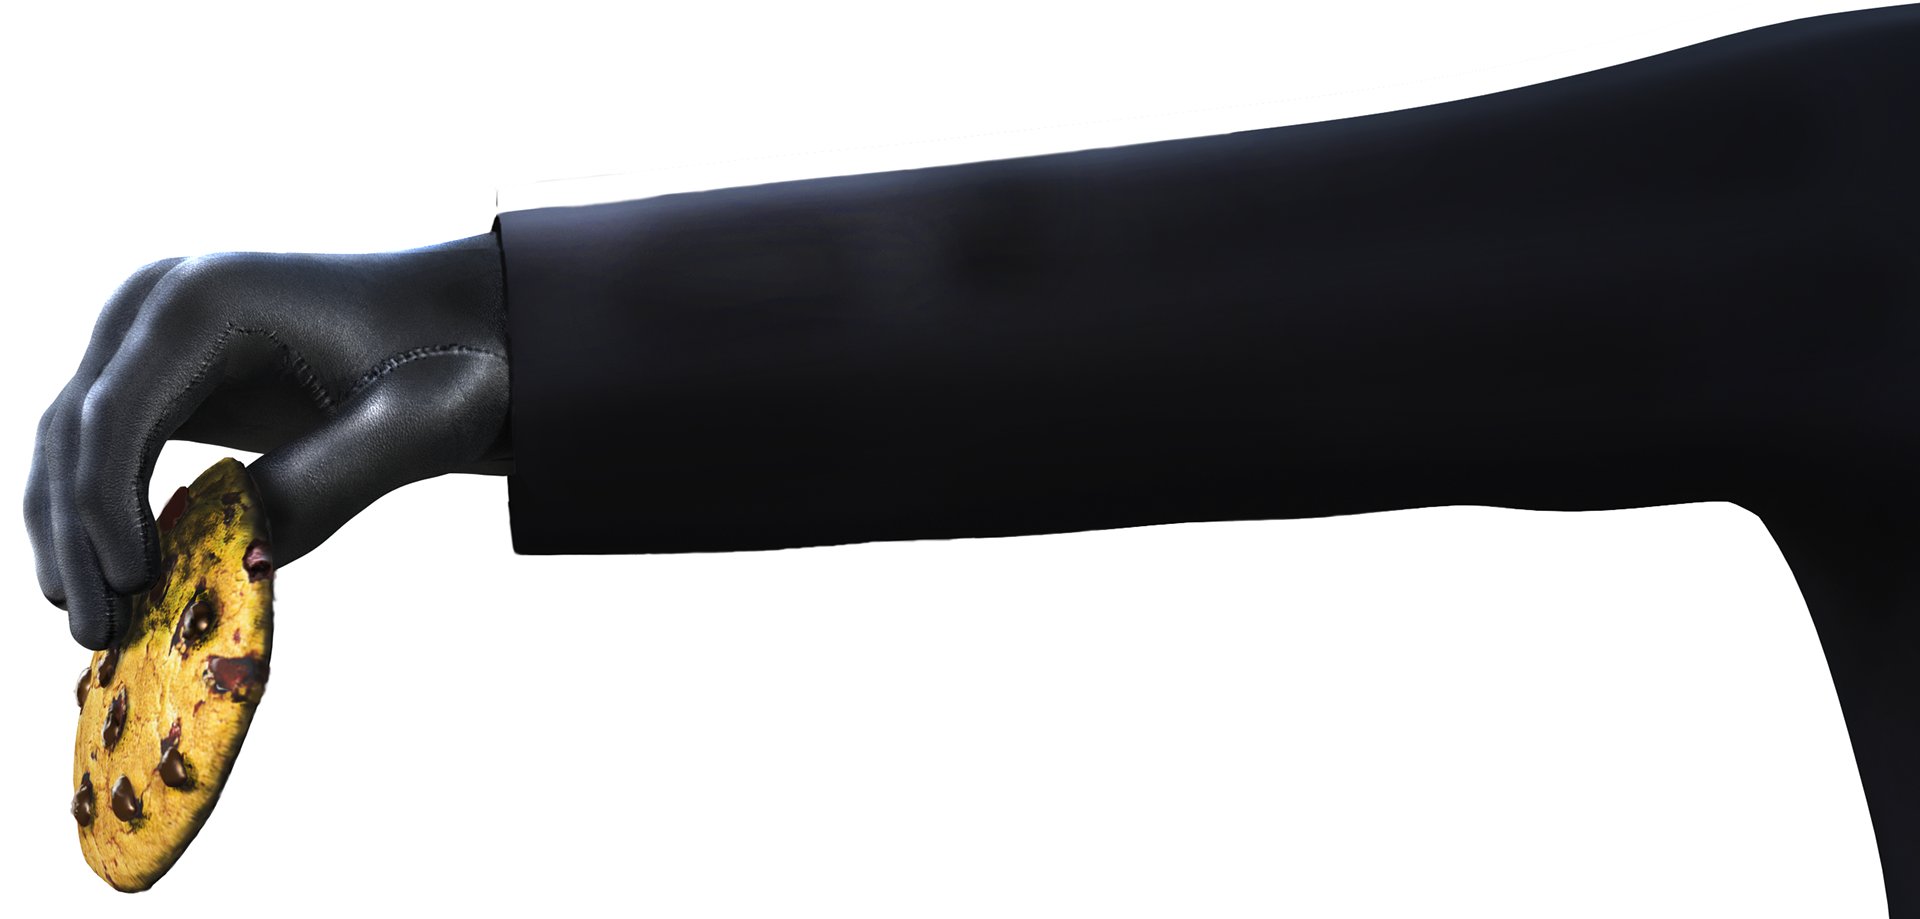
Here was my first completely 3D gloved arm with 3D Chocolate Chip Cookie, but the glove was too tight and did not have realism sufficient for the author. I ended up trying a different texture, but ended up rendering from a photograph I did, the the author requested a standard London Fog type trench coat, so my neighbor who is a dashing classic dresser accommodated me. We ended up using his jacket and my own gloved hand photos, all composited in Photoshop.
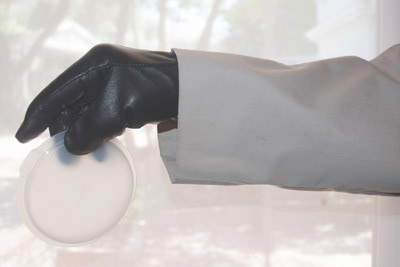
Ken's Arm and glove
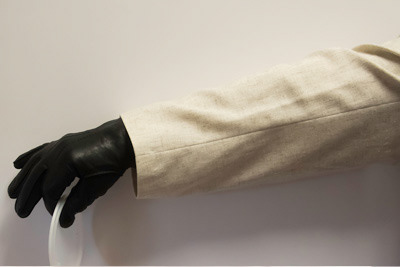
My arm and Glove

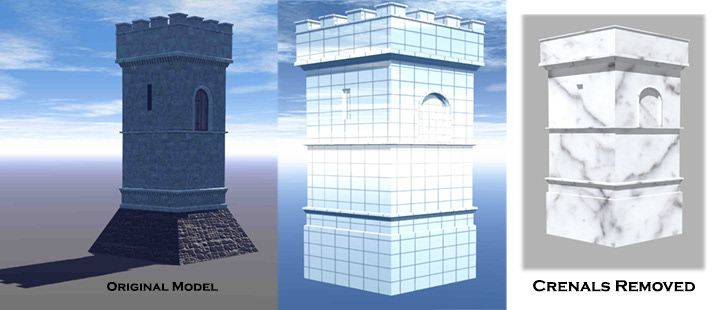
Here was the first render I thought we were in at least the lobby of the ball park for the answer. The author, knowing his book like I could not, I myself not given the book to read, did not find the curtains as described in the book. Also the crenels (the box-like protrusions on the castle top of the castle) needed removal. With 3D illustration you do the actual changes and re-render, so I made the curtains again without the top wood part and searched for a model that had the smaller curtain on top and longer sides. The texture also had to be little yellow flowers as per story. Not having reference I could not argue that.

Combining models for sides and top from another source I created a texture in Illustrator for the little yellow flowers. Because the models differed in their structure it was hard to match textures, but I did with inexact controls, and that working I happily placed the model into the full scene.
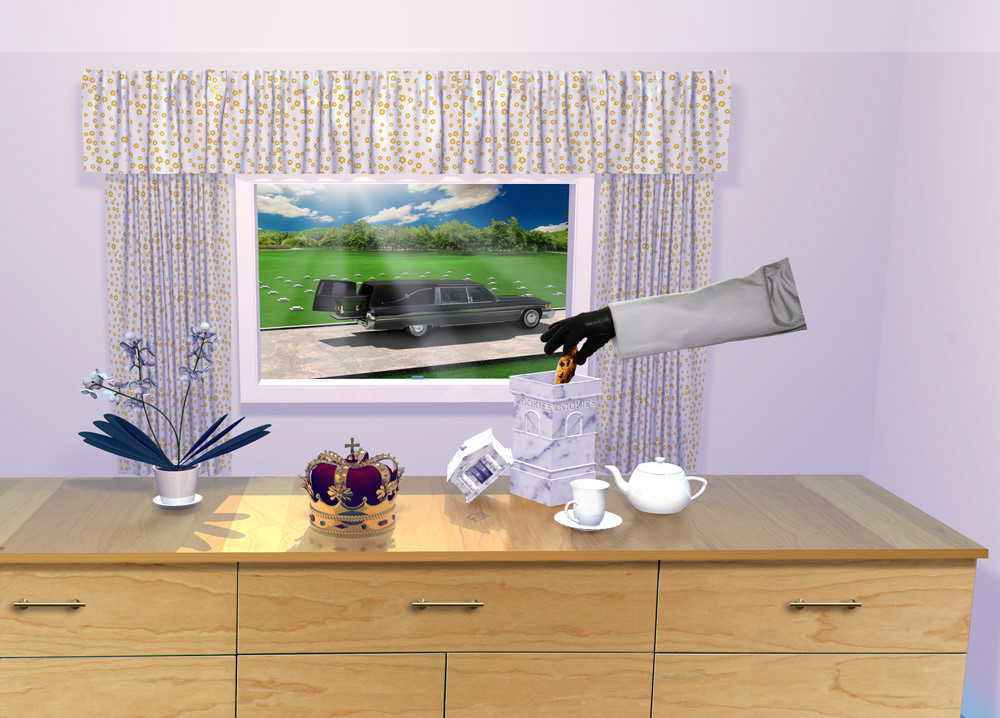
Here you can see the final counter and drawers are built in 2-D out beyond the scene. The arm, glove and cookie, an added 2-D element, is disembodied seemingly. I added the tea pot the cup and the orchid to a scene I thought really needed more things. Placing the previous render of the cemetery behind the window, I saved many additional hours and slowing down the computer with so much geometry to calculate it would take another month to render. I really loved the light coming through the window lighting the counter top and the crown with it's gold, pearls and gems. The crown was purchased and I only re-did the gems as they did not have detailed textures, so I made them Ruby, Sapphire and Garnet with realistic transparency and reflections. Otherwise the crown was a snap.

The book back really needed something. The author did not have as much copy for the bio-like back plate, or even a synopsis. I had a large area on the back cover that was no longer needed, so I asked the author/client for any ideas so I could add as something an element. He told me that there was a bagpiper at the funeral in the story, likely a poignant image at such a somber scene. I found several photos in stock sites that were reasonable. I chose a couple to a few in the light table and chose this for its dramatic color. I found figures from funeral scenes and added them in the picture to show a procession with the casket. I could imagine the pipes lamenting in the background. It was a perfect addition.
Many trials, experiments and angles needed visual exploration. Time was the most costly material for this. I likely did over 200 hours of renders so I could see the results and consult with the author.
Building and modifying, texturing and sizing all a part of the project. Each eliment is modified to suit the scene demands.

In the finished work I liked the result. The lighting interior and incoming through the window was just as I wanted. Lighting in 3D is a complex consideration. It can make the difference between realistic and obvious contrivance. The many hours and tests, experiments and finishing work was worth it. Can't wait to see the book, so I did an image of that too. :-)
FIN